First steps
When you have completed the settings wizard, you can start playing music and building the media library. The main window of Nemp consists of several parts. At the beginning, i.e. when the playlist and media library are empty, some hints are visible to make it a bit easier to get started.
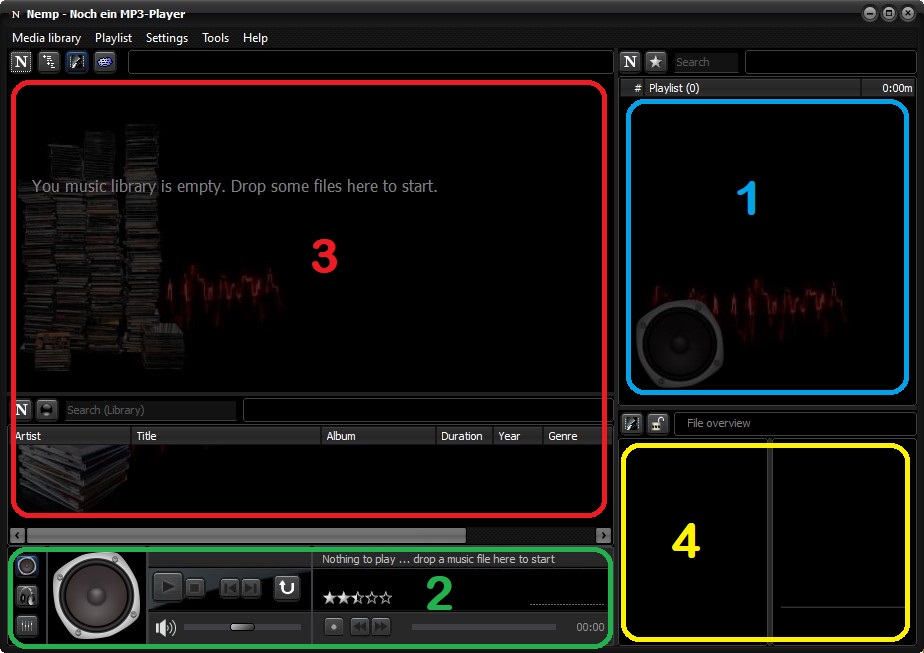
Play music (1/2)
To start playing music, simply drag a few music files (or a folder) to the Playlist area (1) or the Player area (2). Nemp adds the files to the playlist and starts playing them automatically.
Alternatively you can click on the play button. A dialog for selecting music files then opens. And of course it also works extra-complicated via the menu: Playlist→Add files, (or →Add directory, →Load playlist). Or you can use Copy& Paste (Ctrl+C, Ctrl+V) from Windows Explorer.
Build and use the media library (3)
An essential part of Nemp is the media library. All your music files are managed there. You can browse the music collection according to various criteria or search specifically for individual tracks. To build the media library, simply drag your main music folder into the specified area (3). Browsing the hard disk and reading the metadata takes a little time. But it only has to be done once, after that the data is saved and will be available (almost) immediately the next time you start Nemp.
Title information (4)
If you select a title in the media list or the playlist, some information about this title will be displayed in the file information area (4). Besides the cover image or the lyrics you will find some more information like title, artist, album, genre, year, as well as "extended tags".
The button with the lock symbol controls how this display behaves, or from which files this information is displayed.
|
|
The details of the currently selected track from the playlist or media list are displayed. |
|
|
Only the details of the currently played track are displayed. |

